If you’re a DIY lover, installing vinyl windows might just be your next home improvement project. Whether you are looking to boost your home’s value or upgrade old windows, installing vinyl windows is a straightforward and effective way to make a good impression. Vinyl windows are affordable, durable, insulating, and energy-efficient among other things, making it the perfect choice for your new windows.
Steps to Installing Vinyl Windows
Replacing your existing windows with vinyl ones is straightforward–and it may be easier than you think. Try installing vinyl windows in warmer temperatures to prevent the vinyl from contracting or cracking. In cold weather, a snug fit may work for the time being, but it may expand and tighten in the summer. Besides the vinyl window, the materials needed include:
- Tape measurer
- Level
- Caulking gun
- Shims
- Flashing tape
- Power drill and screws
- Window insulation foam
Vinyl windows typically come in white. For a truly eye-catching set-up, an optional step is to paint the pre-existing trim to the new window. If appearance is a priority, consider painting the baseboard trim and door and crown moldings to match as well. But before we get ahead of ourselves, let’s take a look at the steps you’ll need to make when installing vinyl windows.
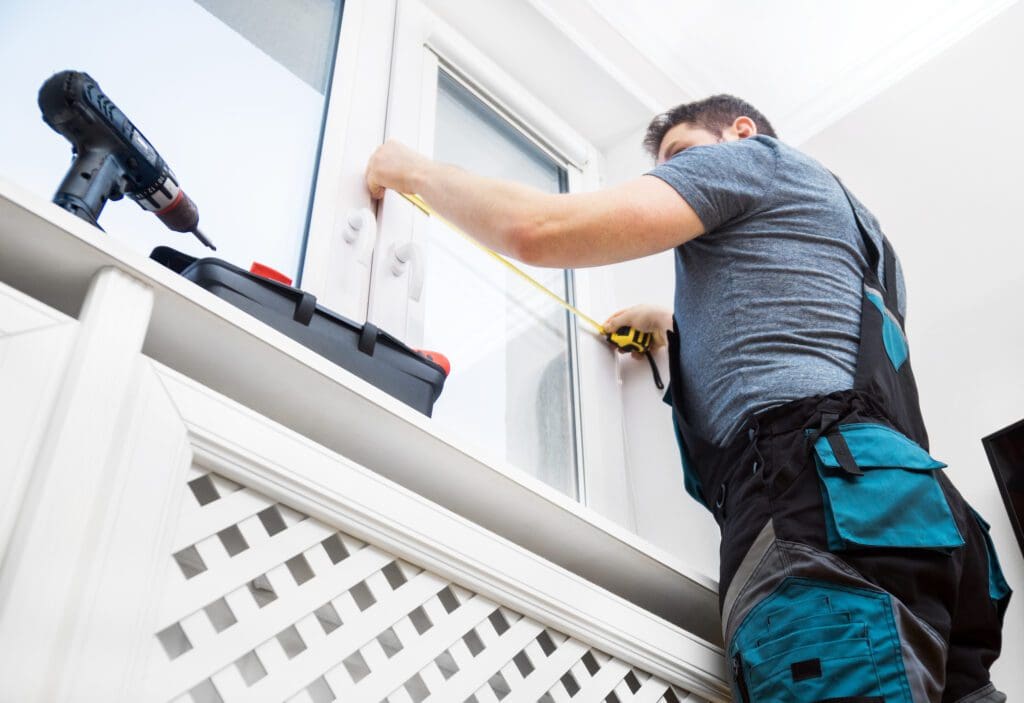
1. Measure Your Original and Replacement Windows
Measuring the dimensions of your windows is crucial to a successful installation. The key is to take your time to make sure your measurements are precise and accurate. Open the lower sash and use a taut measuring tape to measure the width of the middle, bottom, and top of the original window. When ordering your windows, use the smaller measurements.
2. Remove the Old Window
Depending on the age and structure of your original window, there could be different ways to remove it. For all types of windows, remove the window from the outside. For storm windows, lift it from their channels and remove any screws that might have held the window in place. For older windows, you may have to cut the cords, sash springs, or their plastic covers.
Older windows also have interior, parting, and exterior stops. If this is difficult to do, you may need to use an oscillating saw to separate the stops from the frame. Afterward, inspect the remaining frame for any rotting or splitting. Clean the frame of any mildew, dirt, or debris.
3. Position the Replacement Vinyl Window
After prepping the frame, double-check that the sill is level and square. A quick tip–measure the diagonals of the new frame instead of the interior trim for this part. Next, practice centering your window in the frame to ensure that there is enough space on each side for shims and insulation. Measure the dimensions of your replacement frame again to prevent a crooked finish.
Once you’ve checked the dimensions and spacing, continue prepping the frame by using flashing tape or screws to prevent any movement. Line the top, bottom, stops, and sill of the frame with a bead of caulk.
5. Press the Vinyl Window Securely Into Place
Next, position your vinyl window in the opening and press it firmly against the caulk. Secure the window by placing shims at the screw holes in your vinyl window. Screw the shims into the hole from the inside. If the sashes aren’t sitting evenly in the frame, use additional shims on the horizontal elements where the closed window meets the sash. Cut any shims from the top, bottom, or middle that are sticking out.
6. Insulate and Install Window Stops
Squeeze some expanding foam between the existing and replacement window frame. After it dries, cut off the excess foam and install new window stops on the inside of the window. If the gap between the vinyl window and frame is too big, then squeeze caulk into each seam and smooth out with a dampened finger afterward.
Why Install Vinyl Windows?
There are a handful of reasons you may be interested in installing vinyl windows. Firstly, these windows are among the most affordable products on the market. They are light and versatile, which helps make the installation process more affordable. They are also easier and faster to install.
Vinyl windows have a durable build–your windows even last for more than 20 years. The polyvinyl chloride (PVC) in vinyl windows–a common material used in pipes and flooring–strengthens windows and is UV resistant. Vinyl is also heat and water resistant, meaning the material will not warp, rot, or mold in the face of hot weather. In Louisiana, we know that summers can be sweltering and filled with moisture. With vinyl windows, you won’t have to worry as much about that heat.
Additionally, vinyl windows are energy efficient. The heat-resistant qualities of these windows mean that they can provide excellent insulation. This will prevent heat from escaping your home, which regulates the temperature for the utmost comfort. You’ll be able to lower your energy bill at the same time as enjoying the benefits of vinyl windows. Not to mention, the material of vinyl windows is recyclable so you can do your part in helping the environment. Installing vinyl windows will also reduce the need for maintenance.
Renew Your Windows With Acadian Windows and Siding
Installing vinyl windows doesn’t have to be hard! If you’re running low on time and feel that installing vinyl windows would be too difficult to do by yourself, that’s what we’re here for! Acadian Windows is the most trusted professional services company in southeast Louisiana. Our team is thoroughly trained and certified, and we do everything we can to serve you and your home with the highest standards.
To learn more about the beauty and benefits of our vinyl windows, check out our website. Take a look at our new showroom in New Orleans, and read testimonials of our previous happy customers. What are you waiting for? Contact us today for more information about exploring or financing new additions or replacements to your home.